My filming and digital video production interests
(Nonprofessional) Studio Setup
hardware: Canon digital ELPH and EOS cameras
          Sony VX2000 miniDV camera
          Macbook Air laptop
          Sony VAIO P-series mini laptop
software: imovie, quicktime pro, ffmpeg, x264
          my own scripts and programs
formats:  Motion JPEG and h.264 MPEG4 video
One missed photographic opportunity creates a desire to purchase two additional pieces of equipment.
-Murphy's Law
I was the Executive Producer for the feature-length film
“Stolen Good”.
I filmed, directed, and produced a
2 minute political commercial
for a Democratic candidate for the US House of Representatives which aired on KQED, Oct 2004.
DVD and VCD Production
As my twin brother is an independent filmmaker, I’ve produced, from DV source, two versions of a DVD for his feature-length 16mm film, as well as a VCD demo version. I’ve worked on and collaborated on other VCD and DVD projects.
I’ve converted Internet Archive’s
video from RTSP mp4 files to use flash h.264 MPEG-4 video
as well as Ogg Theora video using all opensource software and tools like:
ffmpeg, liboggz, mod_h264_streaming, and flowplayer. (tech details and blog)
I interacted a bit with this DV Forum.
Widescreen video? Rectangular pixels? Anamorphic DVDs? Progressive? I’m an image and video format geek so I love (and do) this stuff! Just say no! to 4x3 interlaced video
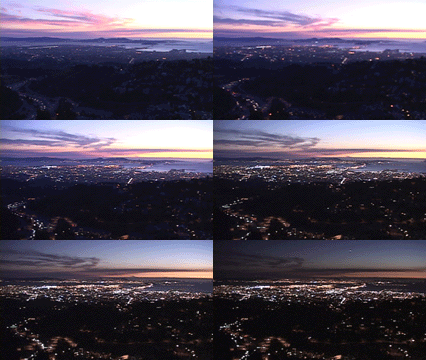
Time Lapse Photography
I shoot with one (and sometimes two simultaneously) of: Sony VX2000, various Canon ELPH digital cameras, or high end Canon EOS.
- With the Sony or ELPH, I shoot “tapeless” and “memory cardless”, opting instead to connect via FireWire and USB, respectively, to my laptop or Picturebook.
- For the Canon, use of the laptop allows me to use Canon’s RemoteCapture software’s built-in “interval shooting” feature for shooting a still frame every 5 seconds (or higher delay).
- For the Sony DV camera, it allows me to use Sony’s PictureGear with DVGate, along with a simple “macro recorder” software (eg: $20 trialware Tasker, to take still frames once every second (or higher delay).
- Alternatively, I’ve used the Elph standalone for lapses with a school eraser and rubberband 8-)
Time Lapse Tricks
I now use the FFMPEG
package
compiled locally on my Mac Leopard laptop
I create “motion-JPEG” AVIs that are ideal for time-lapse video for the
following reasons:
- They allow for arbitrary width and height video (unlike MPG1).
- You can easily convert to (same aspect) another video format like here (with ffmpeg – see above).
- They look better since you can truly “hold” an individual JPEG frame for multiple seconds or sub-seconds, instead of “replicating” a frame.
- They only have the JPEG compression artifacts of the sources, no additional MPG motion artifacts, etc.
- They are smaller in overall size than alternatives like animated GIFs, MPG2, and even MPG1.
- … and yet the quality is BETTER than animated GIFs, MPG1, or MPG2 alternatives.
- Nearly everything in the world plays “Motion JPEG” files as nearly every consumer digital camera saves AVI/MOV “video” files using motion-JPEG.
- An audio track can be added.
- The video filesize is independent of the framerate – it’s merely dependent on the number of total frames. (So no matter how “slow” or “fast” you encode the frames to whiz by, the filesize doesn’t change.)
Thus, I can take 100-1000 JPEG images from a “shoot” and create a video time-lapse of all the JPEG images in a given subdir in a command-line shell (terminal):
ffmpeg -r 6 -i "%04d.jpg" -an -vcodec copy out.avi
Even cooler, you can go directly back to the same JPEG images like so (this is where you can see it is a lossless conversion from JPEGs to Motion JPEG and back):
ffmpeg -i out.avi -vcodec copy "%04d.jpg"
-r 6 is the framerate, ie: “make the video play 6 JPEG images per second”.
It doesn’t get much nicer than that! Not to mention, the encoding is FAST! I recently moved from mencoder/mplayer to ffmpeg since you can specify a complete copy of the input JPEGs (lossless from the source) as well as compress them down a bit (as you like).
You can get this running on Windows with Cygwin, Mac with terminal, and any linux distribution like Ubuntu.
VX-2000 Camera Widescreen Time Lapse Tricks
There’s a cute and rather hard to find out way
to save a still image in native DV format directly from the Sony camera over
FireWire. Normally, if you use Premiere, DVGate, SmartCapture, etc. to grab
still frames from the FireWire connected camera, it will automatically convert
the still for you into a “square pixel” format. As DV is recorded in 720 x 480
pixels (and is neither 4:3 nor 16:9 aspect but actually 3:2), software to get
stills automatically assume you want an image in square pixels. Thus, if the
VX2000 is set in 16:9 mode, it will translate the 720x480 rectangular pixels
into 852x480; if in 4:3 mode, it will translate the 720x480 rectangular pixels
into 640x480.
Since we want to ultimately make a DV film from the stills, we
don’t like that!
Sony offers a quasi-proprietary “DVF” format for storing stills that I haven’t been able to find any documentation for, and suspect is not widely used (although JVC can understand DVF, read on).
While VX2000 is connected via firewire to laptop, run PictureGear.
Then, in the “Folder”(s) window, click on “Outer Devices”. Click “Capture”.
“DVGate Still” shows up. If you right-click,
you can select "Launch DVGate Still".
This, apparently, opens a backdoor from camera into PictureGear, and
will save DVF files every time you hit “capture” in DVGate Still to
PictureGear’s “DVGate Still” folder. (I use Tasker software mentioned above to
record me clicking capture and pausing X seconds. Then I just playback the
recorded “macro” at “full speed” in “infinite loop” and I get a DVF every X
seconds).
You will then note the DVF file is presto! in 720 x 480 (regardless of whether you shot in 4:3 or 16:9 mode). PictureGear allows you to “save as” BMP, TIF, JPEG, GIF (among others), but all seem to wind up as “square pixels” (ie: 640x480 if was shot in 4:3; 852x480 if was shot in 16:9). You’ve just been resampled – not good.
After LOTS of days online looking and searching, I finally came across this gem of a page. There, the replier indicates that JVC’s JLIP VideoCapture 3.1 (free from Germany) can read DVFs and save them as something else. I installed the tool and can now save my DVFs as 720x480 BMPs (which Premiere can happily import). Note the BMPs are still in the right rectangular pixels!
I’ve only gotten the 4:3 images to fully go through my version of Premiere LE where the project, images, and export all stay the rectangular 720x480 pixels. Premiere properly interprets the BMPs to be 720x480 “D1/DV NTSC (0.9)”. I’m pretty sure that the 0.9 refers to the factor of horizontal scaling of 720==>640 that is to be done post-export (in my case, when I make the MPG-1 (VCD) or MPG-2 (DVD) compressed versions of my AVIs using TMPGEnc). 640 / 720 = 0.8888.. or about “0.9”.
For my 16:9 BMPs, my Premiere version defaults to think the BMPs are
in 0.9 mode and not the correct “D1/DV NTSC Widescreen 16:9 (1.2)” pixel aspect
ratio (where 1.2 I’m pretty sure refers to horizontal scaling 720==>852,
where 852 / 720 = 1.1833333 (or about “1.2”)). Thus, they would get resampled
and distorted. However, thanks to DV Forum hunting, I found the way to make
Premiere interpret them correctly.
When stills are on the timeline, select
all of them. Go to “clip” menu, “Advanced Options”, “Pixel Aspect Ratio…”.
Select “D1/DV NTSC Widescreen 16:9 (1.2)”
There you go! Your entire
“capture to export” workflow is now using 16:9 widescreen “rectangular pixels”
and you are free to have as smart or not-so-smart AVI converter figure out where
to go from there.

 More Time Lapses Examples


